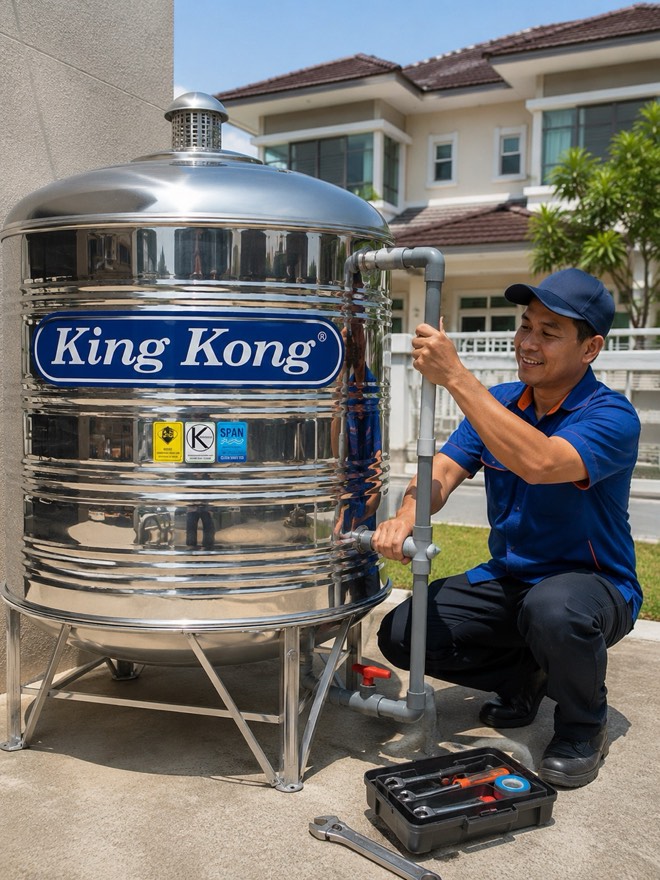
Water tank installation looks like a simple job — place the tank, connect the pipes, done. In reality, a proper installation involves site assessment, load calculations, positioning the tank at the right height for gravity-fed pressure, and neat pipework. A bad installation is the number one cause of water pressure problems and early leaks.
Here is the full process of how a home water tank is installed properly — whether you want to understand it before hiring an installer, or want to judge work that has already been done at your house.
Step 1: Site & Size Assessment
Before anything else, the site has to be assessed: can the existing structure carry the weight of a full tank? A 1000 litre tank weighs close to one tonne when full. Position also determines pressure — the higher the tank sits above the outlet pipes, the stronger the gravity-fed flow.
This is also the stage where the size is confirmed based on the number of occupants and their usage patterns. At Abang Tank, this assessment happens during the free site visit — and the quote given after it is final.
Step 2: Preparing the Base or Stand
A tank needs a level, solid foundation: a concrete base, a galvanised steel stand, or an existing platform that has been verified as sound. An uneven base puts uneven stress on the tank body — a major cause of early cracking, especially in poly tanks.
For kampung houses or ground-level sites, this work includes levelling the area and building the foundation. For terrace houses, it is usually a steel stand in the back area or above the porch roof.
How to Build a Solid Water Tank Base
For a concrete base on the ground, the process is: dig out and compact the soil first so it will not settle, lay a bed of small stones as the foundation, then pour concrete thick enough for the full weight of the tank. The surface must be checked level with a spirit level — not eyeballed — and the concrete needs time to fully cure before the tank goes up. Rushing this step means a base that cracks once the tank is full.
For a steel stand, choose a galvanised stand engineered for your tank size and weight, not a homemade frame welded from leftover steel. Every leg of the stand must sit on the same level, hard surface — even one slightly floating leg shifts the entire load onto the other legs, and that is how stands bend quietly over time.
One simple test after completion: fill the tank to full for the first time and observe it for a few days. A proper base shows no settling, no tilt and no hairline cracks. If any appear, drain the tank immediately and fix the base first — do not wait.
Step 3: Installation & Pipe Connections
The tank is lifted into position, then the pipes are connected: the inlet pipe with its float valve, the outlet pipe to the house system, the overflow pipe routed to a drain, and a gate valve for future maintenance work.
The quality of the pipework here is what separates a clean installation from a recurring headache — a sloppy fitting becomes a slow leak that only gets noticed months later. Every threaded fitting needs enough seal tape and the right tightening torque — overtightening cracks plastic fittings, undertightening leaves them dripping.
The pipe layout is also planned with the future in mind: the gate valve is placed where it is easy to reach, and the pipe runs are kept tidy so they never block access to the tank cover for cleaning work later.
Step 4: Testing & Cleanup
After installation, the tank is filled and every fitting is inspected for leaks. The float valve is adjusted so the full level is correct. Flow at the taps inside the house is tested. The work area is tidied up — including hauling away the old tank if this was a replacement job.
The first fill is also the chance to rinse the tank: the first round of water carries out any dust from the installation work and can be flushed before the tank goes into daily use. After that, open several taps in the house at once to confirm the pressure stays stable when more than one point is drawing water.
Common Water Tank Installation Mistakes to Avoid
We regularly get called in to fix old installations, and the same mistakes keep repeating. These are the ones we find most often:
- No gate valve on the outlet pipe — every small maintenance job forces you to drain the entire tank.
- Overflow pipe not routed to a drain — when the tank overflows, water falls straight onto the ceiling or walls.
- Tank placed directly on tiles or an uneven surface with no base — the load concentrates on one point and the tank body cracks early.
- Outlet pipe sized too small for the house — weak water pressure even with a full, elevated tank.
- Float arm never adjusted after installation — the tank keeps overflowing or never fills properly from day one.
Water Tank Installation Cost Estimate
At Abang Tank, the price is clear from the start: King Kong Water Tank 1000L stainless steel, fully installed at RM 2,914 — including the tank, the complete installation work and a 6-month installation warranty. Already have your own tank? Installation-only is RM 1,350.
Extra work such as building a new base or stand is quoted transparently after the site visit — no surprise charges at the end of the job. Want a pump and filter included? The Complete Package is RM 5,411 (Hitachi 200W) or RM 5,712 (250W), and for those who already have their own set, the installation-only package is RM 2,650.
FAQ — water tank installation
How long does home water tank installation take?
Usually it is done the same day — a few hours for a standard replacement. If a new base or stand is needed, the actual duration is confirmed during the site visit.
Can I install a water tank myself?
Technically yes if you have the skills, but the risks around the tank weight, working at height and the pipework make a licensed plumber the safer choice — especially when the roof structure is involved.
Does the installation come with a warranty?
At Abang Tank, every installation job comes with a 6-month installation warranty. Any issue within that period, just WhatsApp us and we will handle it.
Will my home water supply be cut off for long during installation?
Only during the pipe connection work — not the whole day. We tell you in advance when the water will be shut off so your family can plan around it, and the supply is restored as soon as the flow test is complete.
Read Next
→ Water Tank Base & Stand: How To Build A Safe Foundation→ Water Tank Size for Your Home: How Many Litres Does Your Family Need?